Printing, Sharing, and Exporting
Your Document to Other Formats
If you want to set a custom paper size, choose Manage Custom Sizes from the pop-up
menu. Otherwise, go to step 7.
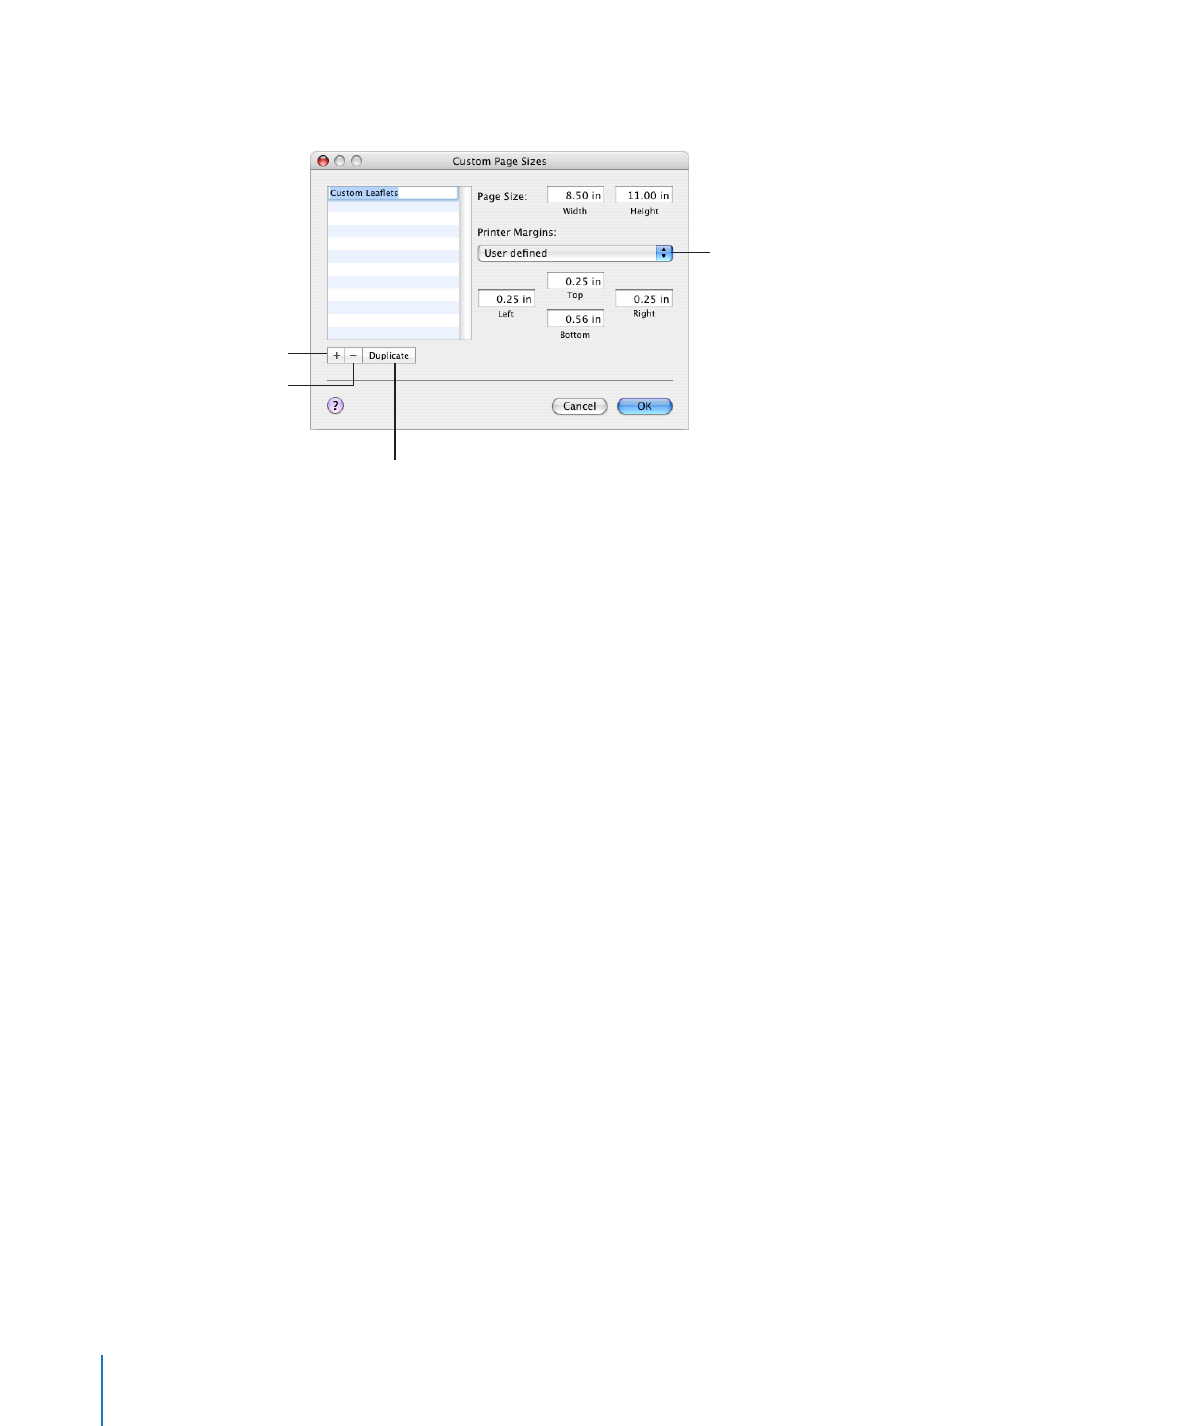
Choose a printer to set
its default page margins.
Create a new custom
paper size.
Duplicate a selected paper size.
Delete a selected
paper size.
4
Click the Add (+) button, and then enter values in the Page Size fields.
Either choose your printer’s default margins from the pop-up menu, or enter your own
values for margins in the Left, Right, Top, and Bottom fields.
If you want to change the custom size’s name, double-click the name in the list and
enter a new name.
5
Click OK.
6
Choose the new paper size you named from the Paper Size pop-up menu, and then
click OK.
7
Select an orientation option using one of the buttons at the bottom of the Page
Setup dialog.
8
To make an image larger or smaller to fill more or less of the paper, type a percentage
value into the Scale field, and then click OK.
A value less than 100% makes the image smaller; a value greater than 100% makes the
image larger.