
Creating a Custom Text Format
You can define text to display before or after a value entered into a table cell when no
other format has been applied to the cell.
To define text to display in table cells:
1
Select one or more cells.
2
Choose Custom from the Cell Format pop-up menu in the Format pane of the
Table inspector.
3
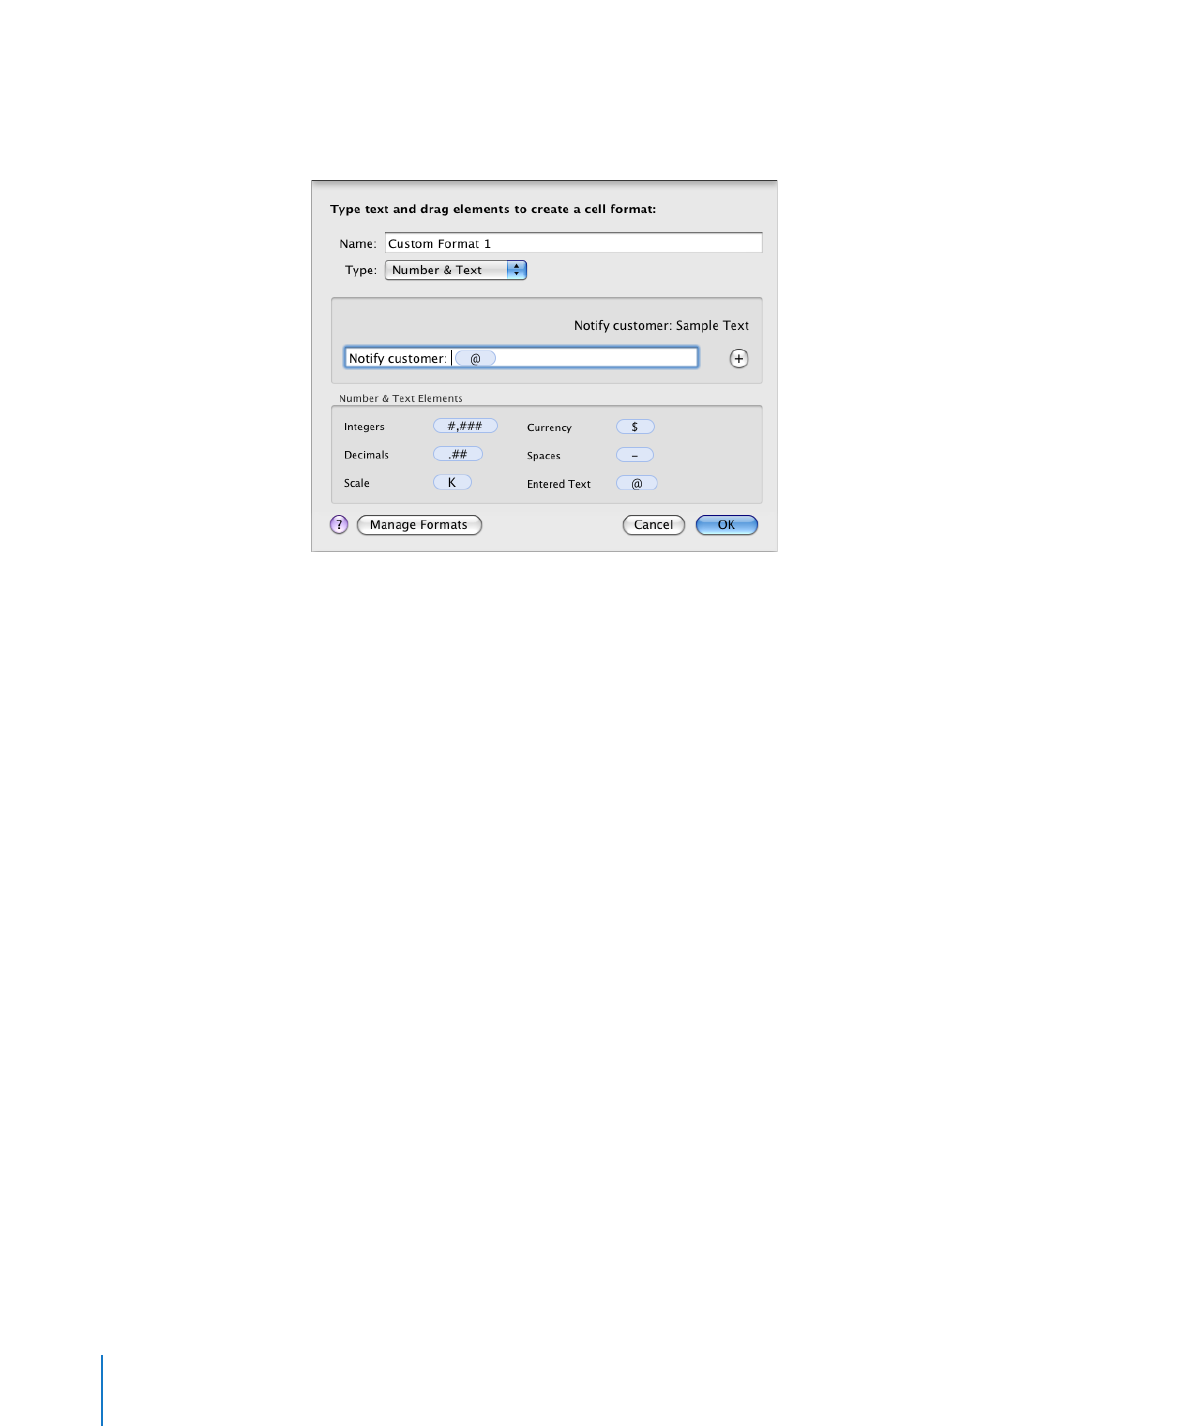
From the Type pop-up menu, choose Number & Text.
4
Drag the (blue) Entered Text element from the Date & Time Elements box into the
empty format field above the box. (Delete any existing elements that may be in the
field before dragging in the Entered Text element.)
5
Place an insertion point before or after the element, and then type your text, including
spaces if required. You can click the element and use the Left Arrow and Right Arrow
keys to place the insertion point.
When you type “Need to update address” into a field with this format, the value is
displayed like this: Notify customer: Need to update address.
6
In the Name field, type a name for your text format.
Custom format names are listed in the Cell Formats pop-up menu in the Format pane
of the Table inspector.
7
Click OK to save your text format and apply it to the selected cells.